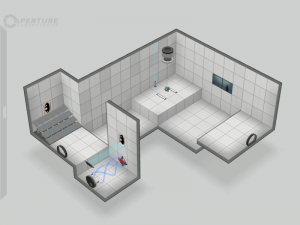
Overview
 If you’re anything like me, you absolutely love monoportal puzzles – puzzles where you only control a single portal. However, making maps for such a mechanic is not as straightforward as one might think. With this guide, we’ll get one step closer to making better monoportal maps, taking full advantage of their quirks and features, whilst also discussing some of the best – and worst – mapping techniques for such puzzles.
• Part 1 | » Part 2 | » Part 3
Introduction
Welcome along, subject, to my guide to making better monoportal maps. I’m glad you’re interested in these types of puzzles, as they are my favorite. With the right knowledge, you too can make great puzzles in which only a single portal is in the player’s control.
Now, you’re probably wondering: “Who are you, HugoBDesigner? Why are you making this guide and why should I care about it?” Well, I’m glad you asked that oddly specific question, fellow map-maker. While I’m far from being the best puzzle designer out there, I do have lots of followers and appreciators who claim that my monoportal maps are some of the best on the workshop, and many of them came to me on multiple occasions for advice, tips and feedback on their own monoportal puzzles, so I figured I’d write this guide for anyone else willing to learn, but with nobody to personally ask for help.
If you’re new to this, however, the question in your mind is probably: “What the heck is a monoportal puzzle, and why does it need a guide?” Thanks for the conveniently appropriate question! Allow me to explain: a monoportal puzzle is a puzzle where the player’s portal gun is restricted to only being able to fire one of the two portals (either just blue or just orange), while the corresponding opposite portal is fixed somewhere in the map.
Unlike what some of you might think, designing a puzzle in which the player is restricted to shooting one portal rather than two is not the same as making a dual portal map with a few tweaks. There are fundamental mechanical differences between mono and dual portal puzzles, and the biggest of them: you don’t own the fixed portal. I’ll get into more detail about the main differences between the two devices further in this guide, but to give you an example: if you had a cube behind a fizzler, you’d need something to turn the fizzler off in a dual portal puzzle. In a monoportal puzzle, however, you can just portal from inside the cube room and take it out!
Thanks to the Aperture Science Monoportal Device, the impossible is easy!
I know what you’re thinking: “Umm, Hugo, I could probably just repurpose some other puzzle for this, it shouldn’t be too hard“. And that’s where you are wrong: to make good monoportal puzzles, you absolutely have to understand the differences between mono and dual portal puzzles, the mechanics of single portals, and how to work with them. A good monoportal puzzle must be well-planned from the start.
I definitely recommend playing some monoportal puzzles to get some inspiration, as well as to get used to thinking with monoportals. But fear not: I’ve prepared a nifty list of some of the best monoportal puzzles I could find by some talented map-makers. Definitely worth a try both for learning and for fun! You can find the link in the last chapter of this guide.
You can also check out my personal collection of monoportal maps, if you find yourself still thirsty.
Alright, enough hypotheticals. We’ve got a lot to do, and only 60 more years to do it.
Getting your monoportal device
“So, Hugo, I want to start making monoportal maps. What should I do?” That’s the key question! There are three ways to make monoportal maps:
-
- Installing one of the latest versions of Beemod;
- Modifying the Portal 2 editor files to include an auto-portal instance, as well as modifying the start of the map to replace the dual portal device with a monoportal gun – requires either Hammer mapping or downloading pre-made instances;
- Making your map in Hammer and manually setting up the portals and monoportal gun.
Time to gear up!
For the sake of simplicity, this guide will assume that you’re mapping with the in-game puzzle editor (also known as puzzlemaker), and that you’ve installed the latest version of Beemod, which handles monoportals automatically for you (assuming you have at least one autoportal in your map). Keep in mind this is only so I can save time on the technical details of actually implementing autoportals, which are covered extensively throughout dozens of different Hammer tutorials and guides. I also won’t be covering how the Beemod autoportals work or how to use them, as those are also detailed in the Beemod application itself.
What I mean by this is, basically, I won’t get into the actual technical details of how to place autoportals or a monoportal gun in your map. Just what to do with them in terms of puzzle design once you have them in place.
Mechanics
Before we dive into level design (or at least some of it), let me specify: when I say “monoportal”, I’m referring to the mechanic itself (having control over a single portal). When I say “autoportal”, I’m referring to the portal that does not belong to you, the one pre-placed in the map by its author.
Now, we should clear up what the differences between mono and dual portal puzzles are. The two devices are fundamentally different in how they behave, and as such should be treated as different puzzle mechanics. Let’s start with the most basic difference, already mentioned in the example I discussed in the introduction:
Autoportals don’t belong to you
That’s right: they’re not yours, and as such you don’t have to consider them when it comes to obstacles. Whenever you walk through a fizzler, the autoportal does not get fizzled. Do keep this in mind at all times, since this can make – or break – your puzzle. A simple analogy to understand these would be considering the room where the autoportal is as a “transition” room. If you want to access any given area on a map via portals, you will cross this “transitional room”.
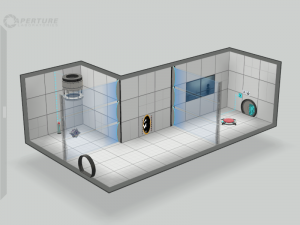
I personally consider this to be the main mechanic of monoportal puzzles, and the one I like the most. Unlike dual portal puzzles, where you have to figure out how to shut down a fizzler or how to walk around it, in monoportal puzzles you often just have to figure out how to get through it: getting out is as simple as shooting a portal. Here’s a rudimentary example of this mechanic in action:
Notice how nothing there turns off the fizzler, yet we can still retrieve the cube. That chamber also makes use of the mechanic described in the next section.
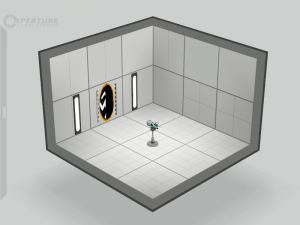
Here’s a puzzle designed specifically for this section, if you want to try out this mechanic, and also get some more insight into how it works:
Dos:
- Make use of fizzlers as portal placement blockers. Despite not being an obstacle to maintaining your portals (in most cases), fizzlers can still prevent you from shooting a portal into an area unless you walk around it. Once that happens, you can easily connect the two areas with your portal. Fizzlers are still object blockers, so getting an object across can be more than just a “walk through fizzler and portal” move, if done right;
- Create player-only paths. If you have an area that can only be accessed through fizzlers which can’t be disabled, and if this area doesn’t have portalable surfaces in it, it is a player-only room – that is, the player can navigate through it, but objects cannot get in or out. If you have an elevated platform with a fizzler right before the drop, it can be a one-way path, as the player can go from the top to the bottom without portals;
- Give areas for the player to access that aren’t directly connected to the autoportal area, in such a way that the player can establish a link between two remote areas easily;
- Create interesting geometry for your map as to allow more variety in how the player can approach a remote area or the autoportal area itself. Perhaps, instead of a fizzler, you can use gaps: the player could perhaps only be able to fire a portal somewhere once they stepped down from the autoportal area, but to get back to the autoportal, they must move their portal closer to them. The puzzle then becomes about gaining easier access to the autoportal area while maintaining the portal you shot.
Don’ts:
- Do not spam your map with fizzlers. Just because they’re not as great an obstacle anymore, doesn’t mean you shouldn’t think carefully about where and how to use them. A bad monoportal puzzle will probably have a ton of fizzlers all over it to seem harder, when you can just easily avoid them. A single, cleverly-placed fizzler can be more interesting than a stack of needless fizzlers;
- Do not abuse the autoportal area as a hub. While it is interesting to have the player go back to it every now and then, making the player go back and forth through it just to dodge a ton of obstacles is as fun as walking around aimlessly. Don’t make your puzzle in such a way that going back to the autoportal all the time solves it; give the player reasons to explore further into the map. Make the player have reasons to want to leave the autoportal area behind. Use it as an intermediate area, a bridge between two other remote areas. The only limit here is your creativity.
Autoportals are pockets
When mapping for dual portal puzzles, have you ever faced the need to “keep” something with the player wherever they go, without the risk of it getting destroyed or stopped by fizzlers, grating or other obstacles? If so, monoportals have got you covered!
By having a fixed portal, you have a constant point of access in the map. Along with that, you can put anything you want in there. While you navigate through the puzzle, whatever you got near the portal stays near the portal, and you can retrieve it as long as you have a portalable surface. Thus, a pocket.
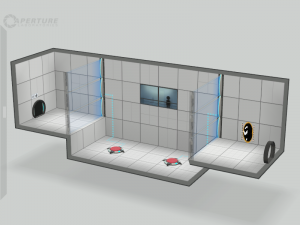
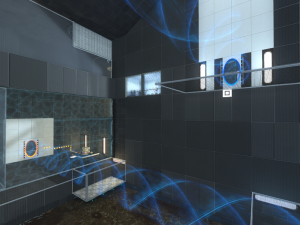
Keep in mind that autoportals are not only useful for keeping cubes when you need to go through fizzlers: they can keep a bunch of stuff such as gels, momentum, lasers, etc. Here’s the simplest example of how storage works:
As you can see, you can use the area around the autoportal as a pocket. Why do I call it a pocket? Because you can “carry” it around: place something there, move to the next area, portal in, grab whatever is there, and use it elsewhere in the puzzle. This is also one of the main mechanics of monoportal puzzles.
Here’s another puzzle, also focused on this particular mechanic:
Dos:
- Use “pocketing” in clever and different ways. You can, for example, place the autoportal on the floor so that it “stores” momentum, be it from a falling cube or gel, or even the player’s momentum;
- Expand the storage area: instead of just a pocket to keep something, integrate it seamlessly into the map, in such a way that the player goes through it both as a storage area and as any other piece of the puzzle;
- Subvert expectations: instead of using the autoportal as a pocket, why not use a different region as such?
Don’ts:
- Do not use pockets for only a single purpose. Using it to move a cube across a fizzler over and over again will get repetitive over time;
- Do not make the pocket a trapping situation. Always allow the player to move past it or portal out of it;
- Pockets are not cages: you can have your autoportal in a relatively open area while still using it as a pocket. It only depends on how the elements and geometry of the map are integrated.
Teleportable entities
While playing with cubes, buttons and fizzlers is all fun and games, most of the time you’re gonna need something else to give your puzzle more substance. This is where teleportable entities come in. When I say “teleportable entities”, I’m referring to some of the major testing elements. More specifically: lasers, funnels, light bridges and gels.
There are two ways of dealing with these entities when it comes to a monoportal puzzle: you either project them straight into the autoportal so that firing your portal will bring the beams/gel to you, or you project them elsewhere, so that you have to fire your portal at its end to bring them to the autoportal area. Let’s look at them individually, including their pros and cons.
- Projected onto autoportal
Has the advantage of bringing the element with you wherever you go. In a sense, turns your portal gun into a laser gun, or funnel gun, or bridge gun, or the gun from that mod we don’t talk about. The downside is that, over time, and if not through careful design, it can easily become a gimmick, an excuse to have a “beam gun”, and the puzzle will get repetitive. Here are just a few ideas to make them less repetitive, but enough creativity and ingenuity almost always does the trick:
- Laser: instead of shining the laser straight at the portal, have the player use a redirection cube to point to it. That way, the player can still use the autoportal as a link between two remote areas, while having a “toggleable” laser gun, and it still leaves a window for laser redirection puzzles in the autoportal area, or angling through the portal.
- Funnel: if you have a blue funnel, make it so that part of the challenge is turning it off/reversing it so that the player can access the autoportal area (since in normal circumstances they’d be blocked by the funnel). If it’s an orange funnel, perhaps have the player not want to enter the portal until they’ve completed some task, and then have them be sucked through the portal. Additionally, being pulled will make the player be locked on the autoportal area, so it’s similar to the blue funnel lock idea, but from the other side.
- Light bridge: by placing the bridge at floor level, it gives you free access back to the autoportal area while still having a bridge, so that you can complement the teleportable beam with some storage/area-connecting puzzles. By moving it up, however, you can make it so that going back to the autoportal area becomes more challenging, in terms of getting back over the bridge. Another technique would be putting the bridge emitter behind grating, so that, while you have access to the bridge, there’s more over where it’s being emitted from, and you could even add an angled panel to block the bridge from going to the autoportal, but still allowing you to use it with your portal.
- Gel: if you have repulsion gel going to your autoportal, it could be an obstacle for cubes unless you shut it off. For propulsion gel, you can use the autoportal area as a booster for flinging, so you could perhaps set up repulsion gel elsewhere, portal there and fling across, bouncing when you go through the portal. For conversion gel, you could have a button that moves the autoportal elsewhere, so you can fire your portal where it was, thus bringing more conversion gel to that area, and possibly giving the player access to it. I’ll be covering moving autoportals further into this guide.
Here’s a video that demonstrates some of the things you can do with entities projected onto an autoportal:
- Projected onto wall
Projecting an entity onto a wall rather than directly onto an autoportal offers you the advantage of making the puzzle less about that particular element and more about navigation and portal management. It also gives you the option of having multiple types of portable elements without having to rely on swapping portals. However, it also offers the challenge that you’ll limit yourself to using that element in only two places: where it’s coming out of, and where the autoportal is. One example of an advantage is that you can place the entity’s end behind a fizzler, so that you first have to get to where they’re being projected from, before being able to use them. Here are some more examples on how to work around these limitations:
- Laser: much like in the previous example, you can redirect it to your portal. However, this time around you can beam it to a wall where you’ll shoot your portal, giving you the laser in the autoportal area. That’ll give players the extra challenge of working towards keeping their portal where the laser is beamed at. You can also play with where the beam ends, since as long as it’s hitting a portalable surface, you can link that area, thus making further use of the same laser to achieve the same goals in different manners.
- Funnel: given that you can only shoot one portal, you can make a funnel become a one-way pass through an obstacle. You can still use it to pull/push objects remotely, thus getting items from or to the autoportal area. Unlike having it beamed straight into the autoportal, this method allows you can use the funnel to cross, for example, a pit right in front of the autoportal area, while still being able to go back to it without having the funnel blocking your way.
- Light bridge: while you can have a gap right in front of the autoportal for a start, you can still, for example, make use of the bridge wherever it’s being emitted. In fact, you can play around with the bridge’s usability with connections that turn either the bridge or fizzlers (or both) on and off. Since maintaining the bridge where your autoportal is is important, fizzlers don’t get quite as “harmless” as they’d normally be with the bridge projected onto the autoportal, so that’s another hazard you can play around with.
- Gels: if your autoportal is on the floor, you can pocket the gel from its source and put it elsewhere. Something else you can do is have the challenge of transporting the gel from its source/autoportal area to some other place via funnels. If you have two or more types of gels, each one of them could have a different impact on the autoportal area: orange gel would turn it into a flinging area, blue gel would give you access to a higher area, or if you speed through your portals into blue gel, it could bounce you across a gap.
Momentum conservation
We all know the old formula: “momentum, a function of mass and velocity, is conserved between portals. In layman’s terms, ‘speedy thing goes in, speedy thing comes out’”. But what changes with that formula when you have one of your portals stuck in place? Well, glad you thought about that dilemma, because I’m about to offer you a solution that I honestly think works best for both of us. While the basics of flinging remain the same, some new ideas can come with it that would never be possible with your dual portal device.
To start things off, the basic idea is that you’ll be flinging either into the autoportal or out of it. So whatever type of fling that is, always make sure that the player has space to perform it. Let’s look at them individually, to make things easier:
- Flinging into autoportal
If you have your autoportal on the floor, this gives you the advantage of pre-placing your portal wherever you want, then jumping into the autoportal from a certain height to fling out of it with certain speed.
Another classic of flinging is the so-called “infinifling”, or “infiniloop”. What that means is having a portal on the floor and a portal on the ceiling, in such a way that the player is in a constant freefall. By having a portalable surface over the autoportal, you’ll give the player the chance to do that, and they can later re-fire their portal to fly off wherever they want.
If you want to convert horizontal momentum into vertical momentum, a couple of ways you can do it is by either having some speed gel in front of the autoportal, or having a faith plate that launches the player into it. In both cases, you once again give the player the option to decide where they’ll end up by letting them place their portal opposite to their target, going through it, and running/being launched off.
- Flinging out of autoportal
These flings might be the most common in monoportal maps, since you’ll always have access to your own portal. You can have the autoportal aimed at the desired location, and have the player find a portalable pit where they can fling into. The advantage this offers is that this fling area could be anywhere in your map, since your autoportal stays in place. You can even have two different levels of fling that get accessed from different parts of the map – and consequently, give you access to two other distinct parts of itt.
You can also combine a fling in and a fling out, by having your autoportal on the floor, gaining some speed elsewhere by jumping into your portal, and while flying out of the autoportal, refiring your portal to reuse that momentum to be launched elsewhere as you fall back to the autoportal.
Portal management
Unlike in a dual portal puzzle, your options for portal management will be more restricted. However, it does not mean you shouldn’t try to use this mechanic, or that it is limited in any significant way. You’ll just need to get a bit more clever before tackling it. For those of you unfamiliar with the concept, portal management is when a puzzle requires you to (well, not to say manage your portals) have careful control of where your portals are placed at each given time. Some examples of it would be: moving the right portal; shooting behind a fizzler and maintaining that portal there; going through a portal, repositioning the opposite portal, then going back; firing a portal in a strategic place, then ensuring it doesn’t get fizzled, etc.
Portal management in a monoportal puzzle might end up relying on flinging, but that’s fine, as long as the awareness of where you place your portal remains. The same goes to choosing which autoportal to use if there are multiple of them (we’re still going to approach that case, I haven’t forgotten). The trick here is to make sure the player knows that just because they have access to the autoportal at all times, doesn’t mean they should go about the puzzle without thought or without thinking twice where they place their portal. This will be more easily achieved via clever geometry rather than fizzlers, though.
Here’s an example: imagine you have your autoportal in a platform, behind a fizzler. Then there is a gap, then another platform with another fizzler. You may drop down and portal back up, but you can’t cross the gap until you disable both fizzlers. Once you do that and is able to fire your portal across, the puzzle could be about trying to do things without touching the fizzler – thus losing the portal.
Just a one-off example, if you catch my drift.
Another example: you have an autoportal on the floor. You portal to the autoportal room, then portal to a high platform. From that platform, you jump into a pit fling, and fly out of the autoportal. With the gained height in the autoportal area, you could gain access to a previously-inaccessible area.
Another advantage of monoportal management is maintaining elements such as gels or cubes. You could, for example, position a cube above the autoportal without firing your portal (such that the autoportal is activated, but not open/linked). Then, portal elsewhere where you would need the cube to drop (DISCLAIMER: such a move might not work in all cases, since cubes above closed portals tend to be finicky and frozen in place). Another example is maintaining gel flinging. You must have linked portals at all times in order for the gel to stay accessible. However, if the player must cross fizzlers in order to get where they need the gel, they might have to get more clever with where – and how – they place their portals, so that they can get there and still have some gel to use.
These are, of course, just examples. There is no one definitive rule or set of rules as to how portal management works with autoportals in the mix, but as long as you have a good grasp of the mechanic – that is, playing enough maps with them, and experimenting with them yourself – you’ll most likely get something clever out of it.
Moving autoportals
At last, we tackle the 7-headed beast. Or, hopefully, at most 3-headed. Contrary to what some people might think, I believe a map should have no moving autoportals, or just a pair of switchable portals. I’ve seen monoportal maps with lots of different autoportals, but I find those to completely defeat the purpose of autoportals: they’re meant to limit your access to portals. Giving the player too many autoportals might be either overwhelming – trying to figure out all the connections required for that one autoportal – or mind numbing – there are so many autoportals accessible that it might as well become a dual portal puzzle.
Though it is not a rule, and although I always encourage exploration/creativity, I believe a good monoportal puzzle should never require more than 3 autoportals. I personally have never even made a monoportal puzzle with more than 2 autoportals, which I find to be the sweet spot, with 3 requiring extra clever management to make it work.
For most monoportal ideas, one autoportal should suffice. It gives you a static place you can return to, a fixed point of reference. It makes your puzzle easier to be grasped and understood, and the playing experience much more linear. Your player can always count on knowing where they are or where they can go to, because they can always look back at where the autoportal is, and use it as a reference point for progress.
Sometimes, however, you’ll want the player to have access to two different areas, or use a more clever fling, or encourage some more complex management thinking. That’s where the second autoportal comes to play. I believe the player should always have a default autoportal, though, with the second autoportal being the one being turned on/off via input. However, clever usage of two autoportals requires being able to think outside the anchor autoportal. This can be achieved either by “replacement” (the secondary autoportal temporarily becomes the anchor, in terms of reference of progress) or by “complementation” (that autoportal becomes a tool to access an area, an element, or a move). In the latter case, it is very important to not use that autoportal just once: if you don’t need the secondary autoportal more than once, it might mean your puzzle could use some redesigning to better accommodate for the main autoportal.
I don’t have much experience with 3-autoportal puzzles (or more than 3, for that matter), having never made one myself, nor played many of them. But from the ones I’ve seen, few were clever enough to make good use of each of them. The problem here is not that they can’t be used well, but rather that using each autoportal effectively and efficiently becomes nearly a burden. You should justify the need of each autoportal by having them be crucial in a move or set of moves relevant to the intended solution, and have them be used more than once, in different/unique ways as to provide a reason for each of them to exist.
Nevertheless, here are some concepts around moving autoportals that I find rather interesting:
- Anti-bootstrapping
Flying to the funnel, like a circus.
The name here is merely figurative, but I thought it was interesting enough to make an association. What I mean with anti-bootstrapping is not an autoportal powering itself – though that can still be achieved – but rather it unpowering itself. If, for instance, you place a cube on a button to move the autoportal, but you do so across the portal, you’ll have remotely moved the portal without being where the input was. This can be done either by removing the input (for instance, lifting a cube off a button) or by including the input (placing it on the button), both of which done across portals.
This offers the possibility of portal management as well as controlled flinging, by allowing you to connect two areas you otherwise would not be able to. It might also allow you to gain access to teleportable entities in a remote area, when you wouldn’t be able to get access to it in some other way.
In order to not be too vague, let me give you a practical example: suppose your primary autoportal is facing directly a funnel that ends on a button, and that button activates the secondary autoportal, which gives you a light bridge. You need the bridge to cross a gap, but that area cannot be accessed from the primary autoportal. You make your way to the gap area with the first autoportal, then face the need to swap the portals. How would you go about that without going back through the portals? You could have a cube dropper at a certain height, then placing a portal underneath it, such that the cube will fling into the funnel on the other side of the portal, thus remotely switching the portals for you without having you leave the gap area or return to the autoportal area.
- Remote pocketing
This refers to being able to use the secondary autoportal as a pocket whilst maintaining the primary autoportal as the main accessible portal. It then becomes a puzzle not of how to use the primary autoportal as a pocket, but rather how to gain access to the second autoportal. It could be a pocket for as long as you keep it open, or you can just use it to get temporary access to something in the second autoportal area while maintaining your portal in place.
One example: suppose your primary autoportal is on the wall, and your secondary autoportal is on the floor. You might want to drop a cube on a button, but you can’t walk to where the button is, only being able to shoot a portal above it. Now, suppose that the autoportal-switching button is conveniently placed somewhere near that area. You could stand on the button, portal a cube across, then move out of the button, thus keeping the cube “trapped” in the secondary autoportal area, right over the now-closed autoportal. Go back to the goal button, place a portal over it, return to the switching button, and simply step on it. The simple act of stepping on it will make the cube fall through the autoportal, into the goal button, even though you would not be able to do that with your primary autoportal.
- Beam replacement
In this scenario, switching the autoportal essentially means choosing between teleportable entities. You can either have two different teleportable entities, one in each autoportal, or two similar ones, but with different effects when using either. You can even have one “free” autoportal and one which redirects a beam. The trick here is to be careful as to not use one of the autoportals as a “beam gun”, as explained earlier.
You may even want to have the beams “toggleable”, or even redirected, such that it doesn’t become a predictable “oh, I gotta use this autoportal for the laser” type of scenario. For instance, like in the “Laser projected onto autoportal” example from earlier, you could redirect the laser with a cube, pointing at the secondary autoportal, while keeping your primary autoportal laser-free, only switching when you need a laser, or later on when you need to retrieve the laser redirection cube. You can even do something similar to the “Anti-bootstrapping” example, which provides you with a light bridge on one of the autoportals.
- The Switcheroo
Pull the Leg, by HugoBDesigner, where a switcheroo is required for completing the puzzle.
This is an interesting mechanic I don’t see being used very often. In this scenario, the autoportals are positioned in such a way that, when using one autoportal, you get a feature (for instance, a teleportable entity pointed at it). On the second autoportal, you must reposition your portal in such a way as to recover the previous state, but with your portals flipped (in the given example, it’d mean turning it into a “teleportable entity projected onto wall” scenario).
The thing about a switcheroo in monoportal mapping is that the order of the portals does matter. Unlike in a dual portal puzzle, where you can swap the portals with no difference in the solution of the puzzle, in monoportal maps, having the autoportal be in one end or the other of the connection could mean being able – or not – to overcome an obstacle or complete the level. This is often achieved by having a fizzler between the two autoportal areas, such that it “filters” the direction the player is moving.
You could, for example, have a funnel pointed at the primary autoportal. You could ride along and through the portal to an area where you can switch the portals. After doing that, there could be a gap that prevents you from going back to where you need. Your autoportal is on the other side of the fizzler and it has no funnel pointing at it. What you could do then is placing your portal where the primary autoportal was, such that you still get pushed across the gap as if the portals were swapped, while still maintaining a link to the secondary autoportal area – even after going through a fizzler.
• Part 1 | » Part 2 | » Part 3
Tags: Autoportal, Level design, Mapping, Monoportal, Portal 2, Puzzle, Puzzle design
discuss
Guide to Monoportal Mapping : Part 1 | Nodraw.net