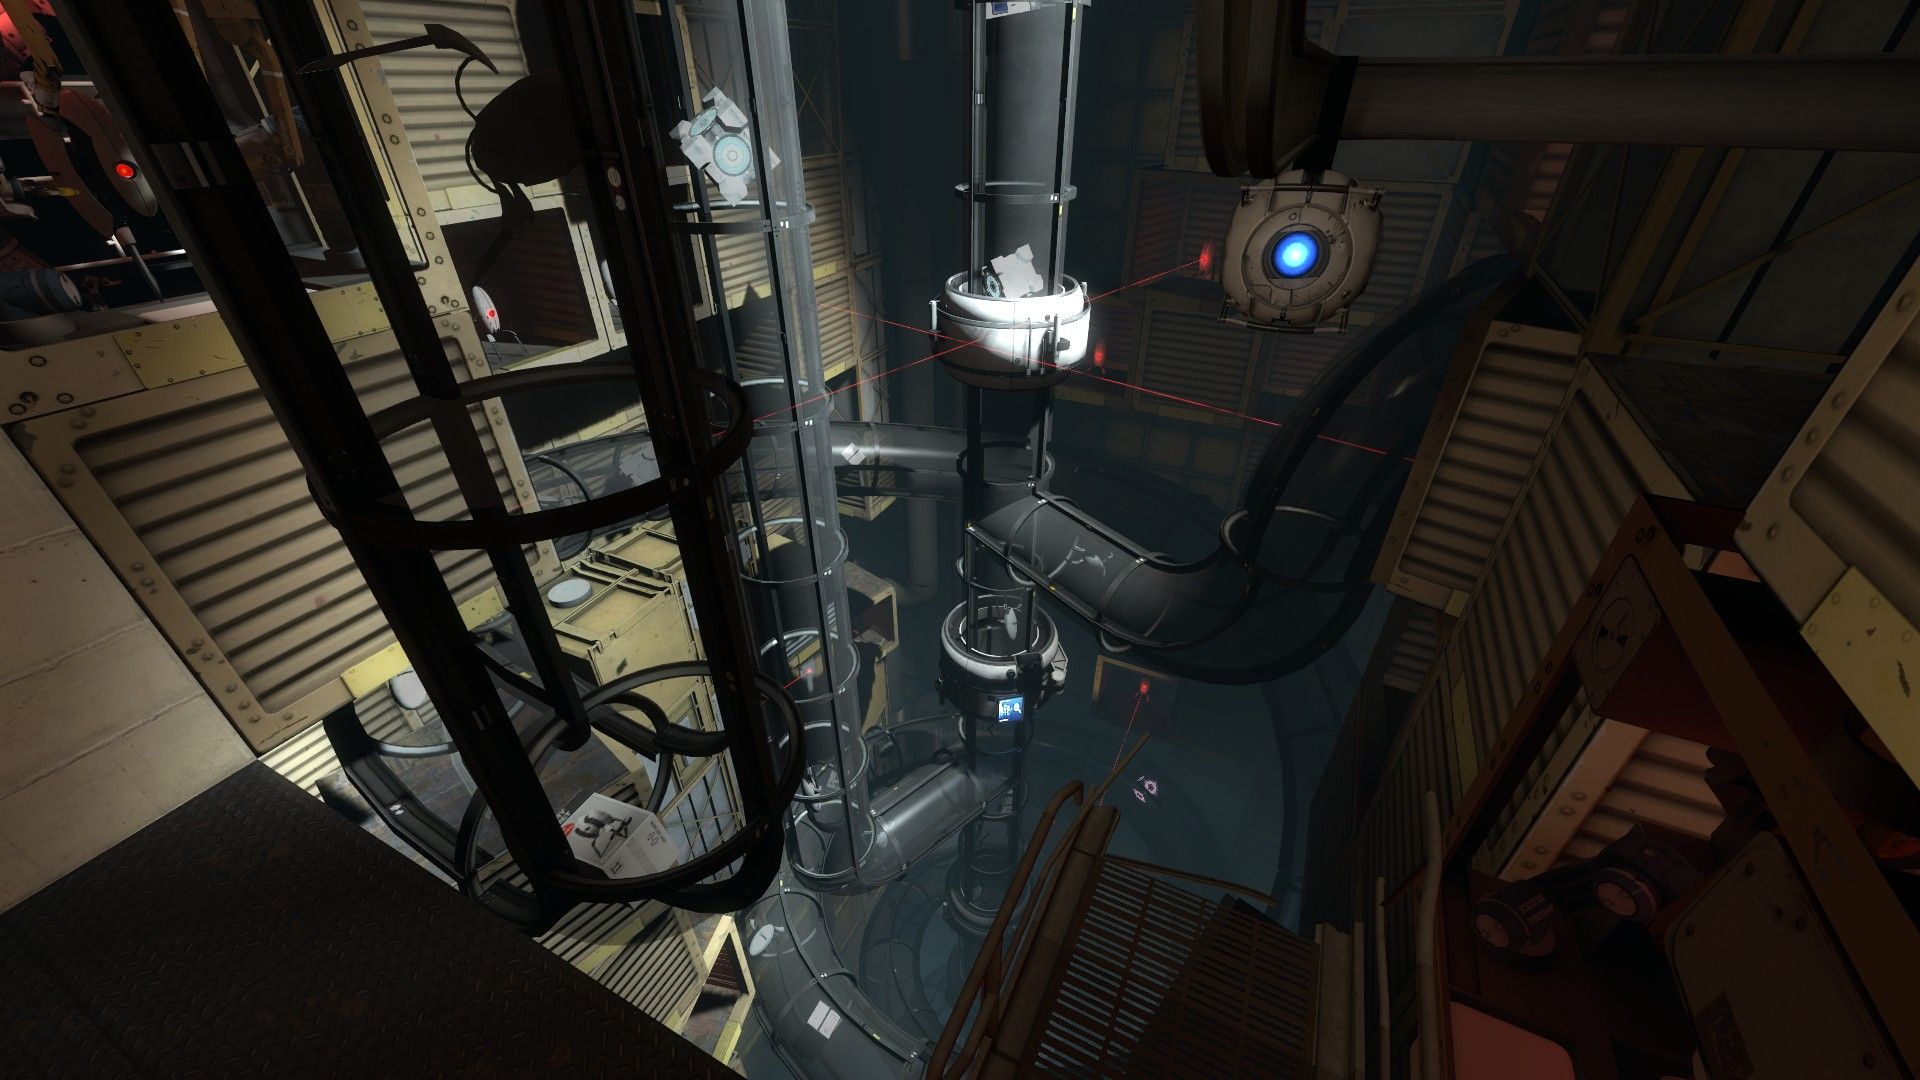
Did you ever wonder how Valve did their awesome vactube ride sequence? The answer is with a custom animated model. But did you know that you can do it by yourself without any model? It is actually pretty easy. Let me tell you how.
Setting it all up:
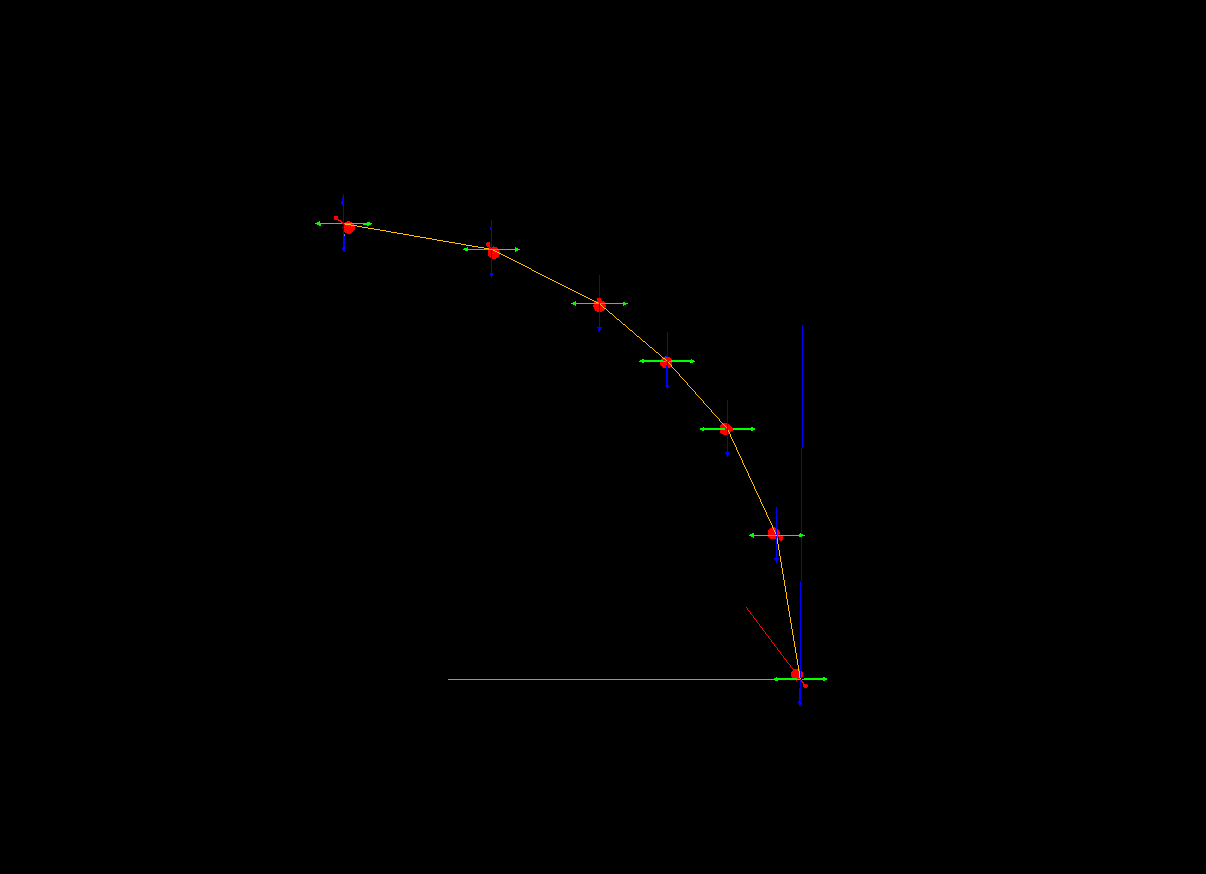
The setup of path_tracks in vactube_90deg_02.mdl
To start things off, you would need to lay out your path:
- Make a small starting area (i.e. where the player would start the ride).
- Place a path_track at the height of the player’s head (64 units above ground). Call it vactube_path_1. In it’s settings, set Orientation Type to No change.
- Shift+drag your first path_track to make a new one 32 units above the first one. This would make sure it’s settings are done and that the first one would be connected with this one. Check it’s name, see if it is vactube_path_2. Check if in your vactube_path_1 the Next Stop Target is set to vactube_path_2.
- Place your first pipe model.
- If it is a straight pipe:
- Shift+drag a path_track at the start of the first curve pipe. There is no need to waste path_tracks on straight paths.
- If it is curved:
- Shift+drag path_tracks that would immitate the path inside the tube. Follow the curve of the tube to map out your path. The more path_track‘s you have, the smoother it will be (although you won’t need to many, refer to the screenshot).
- If it is a straight pipe:
- Repeat step 4 until you’ve mapped out your path. Make sure all your path_tracks are connected. Make sure your path is stuck to grid: it would be easier to fix things if there are any problems.
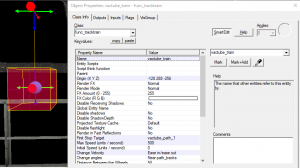
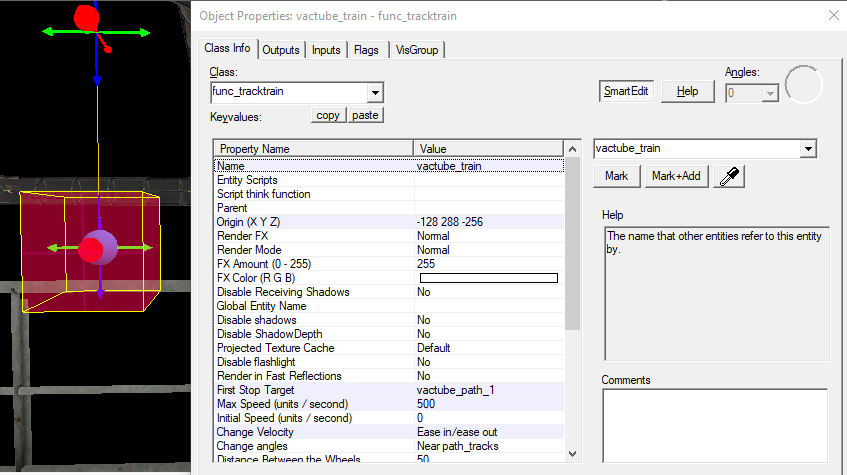
How your track_train should be
- Create a 16×16×16 cube with an invisible texture. Make it a func_tracktrain. Call it vactube_train. Set it’s Max Speed to 500; Change Velocity to Ease in/ease out; First Stop Target to vactube_path_1. Place it onto the first path_track (so it is also 64 units above the ground). In it’s Flags tab uncheck everything but Fixed Orientation.
- Testing the setup (skip this step if you are sure everything is working):
- Change the texture of your func_tracktrain to any visible texture.
- Compile your map.
- In the console (enabled in settings) type ent_fire vactube_ride startforward.
- If everything is working, you should see the box (func_tracktrain) go all around the path and not rotate. If it doesn’t, check the following:
- If your func_tracktrain is rotating:
- Make sure your Fixed Orientation flag is checked.
- Make sure in all your path_tracks Orientation Type is set to No change.
- If your func_tracktrain stops midway through:
- Check if that path_track is connected to the next one. Check if it doesn’t have any outputs that tell the func_tracktrain to stop.
- If your func_tracktrain doesn’t start:
- Check if you have set the First Stop Target to
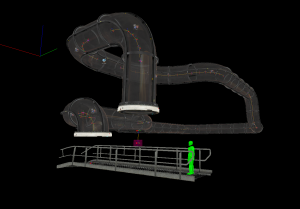
What you should have by the end of this part
vactube_path_1.
- Check if you have set the First Stop Target to
- If your vactubes are all weirdly shiney:
- Place an env_cubemap in your level, preferably at the middle of the track.
- If your func_tracktrain is rotating:

If everything works, you’ve done the hardest part. Now you can rotate your vactubes and the path_tracks with them to make your path more interesting.
Tip:
Make an instance with pre-placed path_tracks to save time! Alternatively, you can download a pre-made vactubes with pathtracks instance.
Working with the instance:
- Change the $first_stop_target to @vactube_path_3 (make sure your Next Stop Target in your previous path_track (vactube_path_2) is set to vactube_path_3)
- Change the $next_stop_target to @vactube_path_4.
- In the next vactube, change the $first_stop_target to @vactube_path_4 and $next_stop_target to @vactube_path_5.
- Repeat steps 1-3 until you are done.
- Make sure the last path_track (or the one that is the $next_stop_target of the last instance vactube) is called @vactube_path_…
Why @? It is because that is the way instances work. If you didn’t put the @, the names of the path_tracks would change, which would break the whole route.
Making the ride functional:
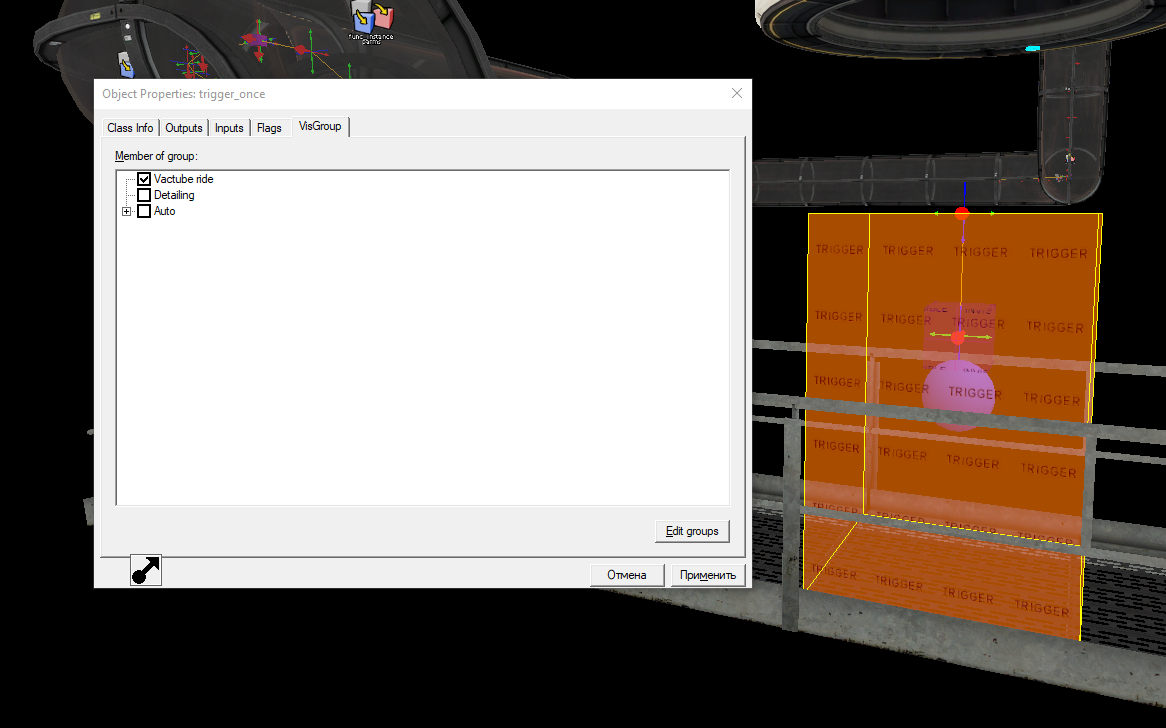
This is what your trigger_once should look like.
Now you are ready to make the player ride the vactube.
- First, make a brush in the area from which you want the player to be sucked in. Color it with tools/toolstrigger. Make it a trigger_once. In Flags see if Clients is checked. Uncheck everything but the Clients and Correctly account for object mass.
- Create a point_viewproxy. Place it in the middle of your func_tracktrain. Call it vactube_camera. Change the Offset type to Ease to camera. This would let the player look around. Change the Proxy Entity to vactube_train. Make sure both of it’s Flags are chec
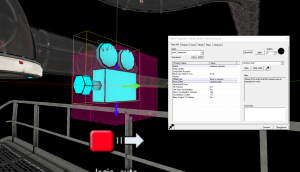
This is how your point_viewproxy should be
ked.
- Add a logic_auto. In its Output add an output OnMapSpawn vactube_camera Disable 0.00 No. This would make sure the player doesn’t start inside the camera.
- In the trigger_once‘s Outputs add these outputs:
- OnStartTouch vactube_camera Enable 0.00 No
- OnStartTouch vactube_train StartForward 0.50 No
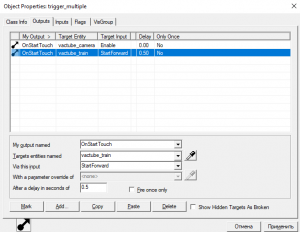
The outputs of the trigger_multiple (after step 6)
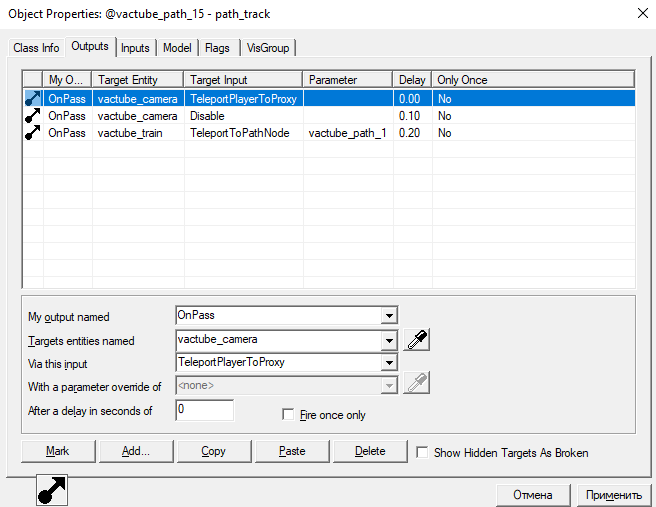
- On the last path_track, add these outputs:
- OnPass vactube_camera TeleportPlayerToProxy 0.00 No
- OnPass vactube_camera Disable 0.10
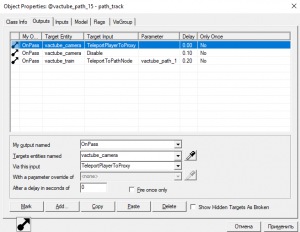
What your final path_track’s outputs should be (after step 6)
- Making the ride re-doable (skip this step if your ride would be one time only):
- Change the trigger_once to a trigger_multiple.
- On the last path_track add an output: OnPass vactube_train TeleportToPathNode vactube_path_1 0.20 No.


After this your vactube ride should be all working. If it doesn’t, check the following:
- If you are unable to start:
- Check your Flags in the trigger_once (trigger_multiple). Make sure Clients is checked.
- Check the outputs of your trigger_once (trigger_multiple).
- If you are taken to the camera but do not move:
- Check your point_viewproxy. Check that Proxy Entity is set to vactube_train.
If you have any further questions, see the example map (note that this map uses the instance above. Place into SteamDirectory/steamapps/common/Portal 2/sdk_content/maps/instances).