I’ve not been doing much recently due to the grind of real life and being distracted by borderlands (which is, by the way, an excellent game only let down by its lack of user created content) But I thought I’d finally find out just how the seamless texture stuff added for the antlion tunnels in episode 2 works. It’s actually incredibly awesome and will have major applications in HL2 mods going forward provided people actually pay it some attention.
Remember how they managed to have such complex displacements inside these intricate caves and yet not a single visible texture seam?
After a bit of tinkering I was able to make my own, I believe they’ll only work as displacements but I might be wrong. You can do the full range of normal texture options with them as well: specularity maps, normal maps, blend textures etc. are all very possible. I whipped up my own texture to show clearly how it worked, here is the texture side by side with the .vmt for it:
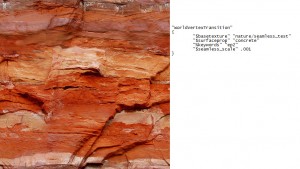
I chose a strong horizontal element to see how it blended directions
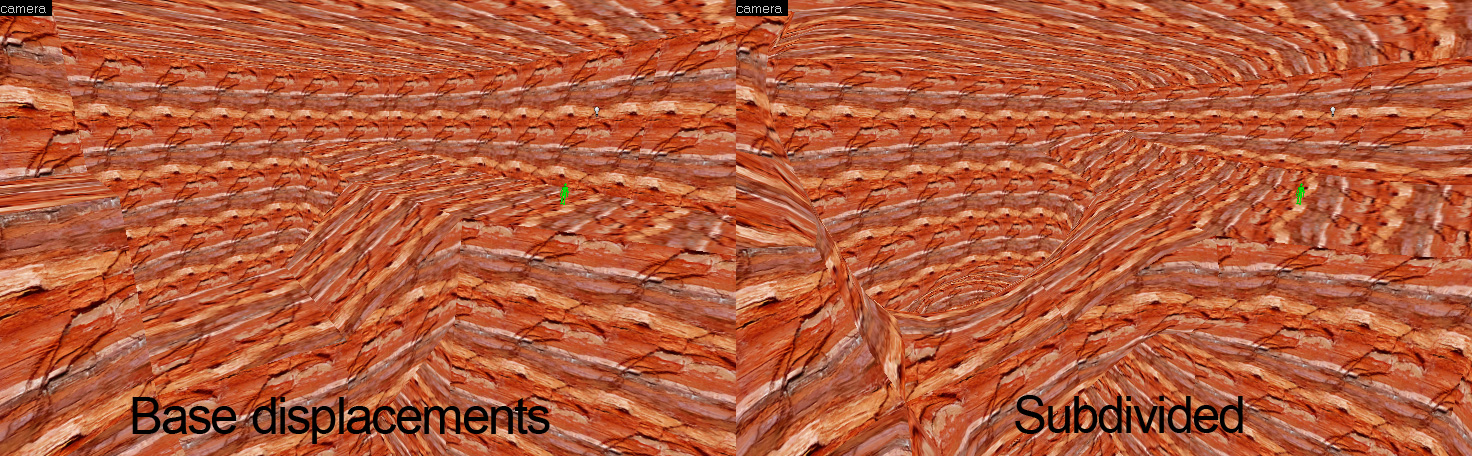
It really is as simple as adding the “$seamless_scale” value into your texture! Be warned though the scale is set per-material instead of in hammer and it doesn’t use the conventional hammer scale, in this case smaller numbers give larger textures. When I thought I’d want to initially try a scale of 1 I found that the entire 1024 pixel texture was tiling every ~5 hammer units. That is, far too often! Making myself as complex a test map as I could be bothered I resorted to subdivide to get smooth displacements, which didn’t let me down too badly.
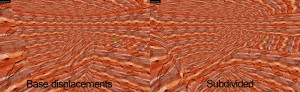
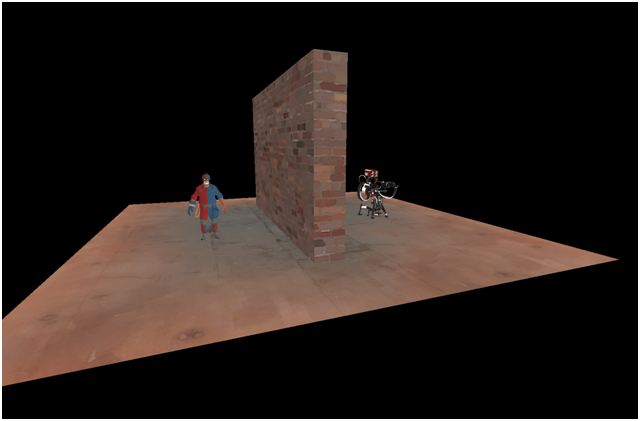
Here is the geometry I made from inside hammer compared to the same geometry subdivided. Apologies for the orange-ness of it, but you can definitely see seams along the lines of the displacements.
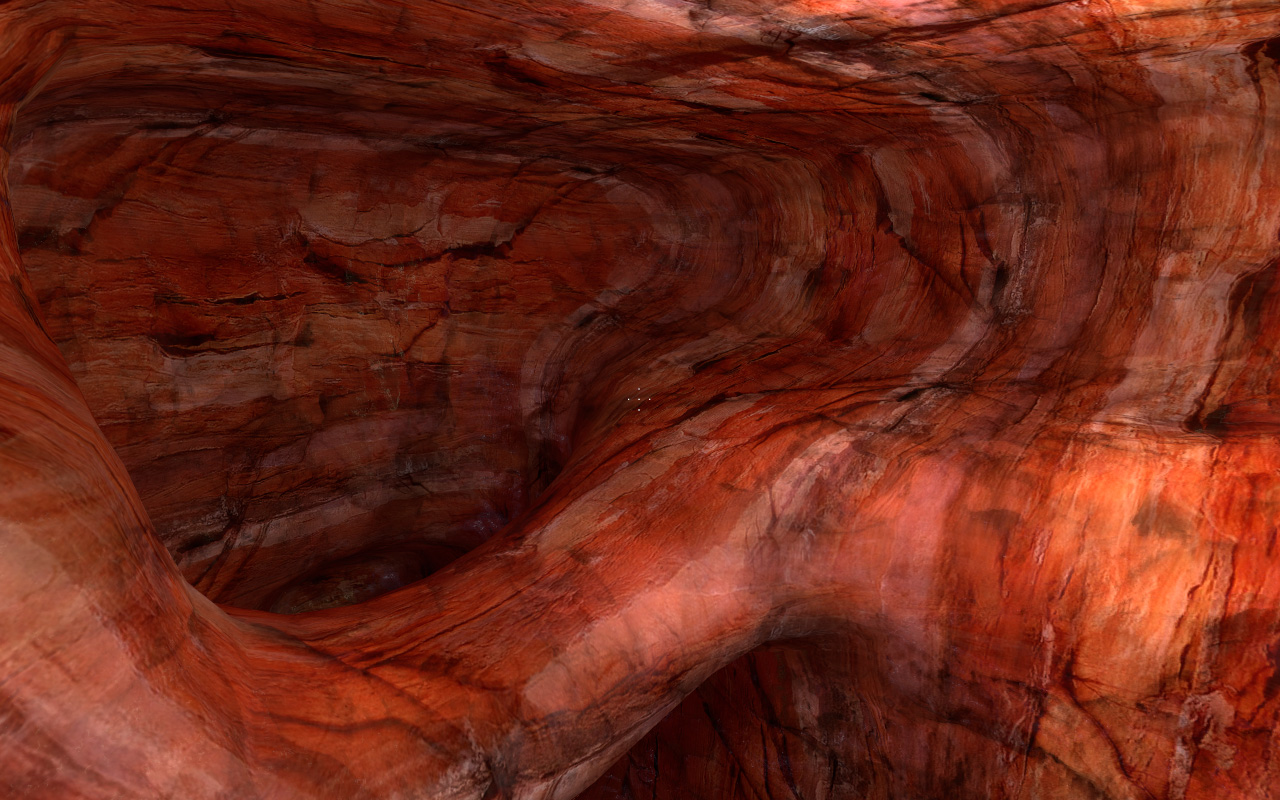
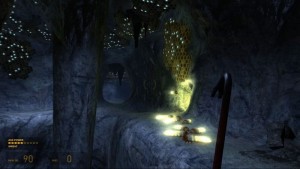
When compiled and run in episode 2 here is what it looks like, you can see that it doesn’t make any attempt to keep the texture’s rotation which makes this example not so good. It lends itself well to noisy materials that don’t have a logical orientation (such as the antlion web) since you won’t notice they’re rotated on some walls. You can also see that the scale is different to that in hammer, since the scale you make it in hammer is irrelevant. Most importantly it blends all my seams together so into a nice smooth transition.

No more nasty seams for complex displacements! Huzzar!
Now go see what you can do with this amazing feature!